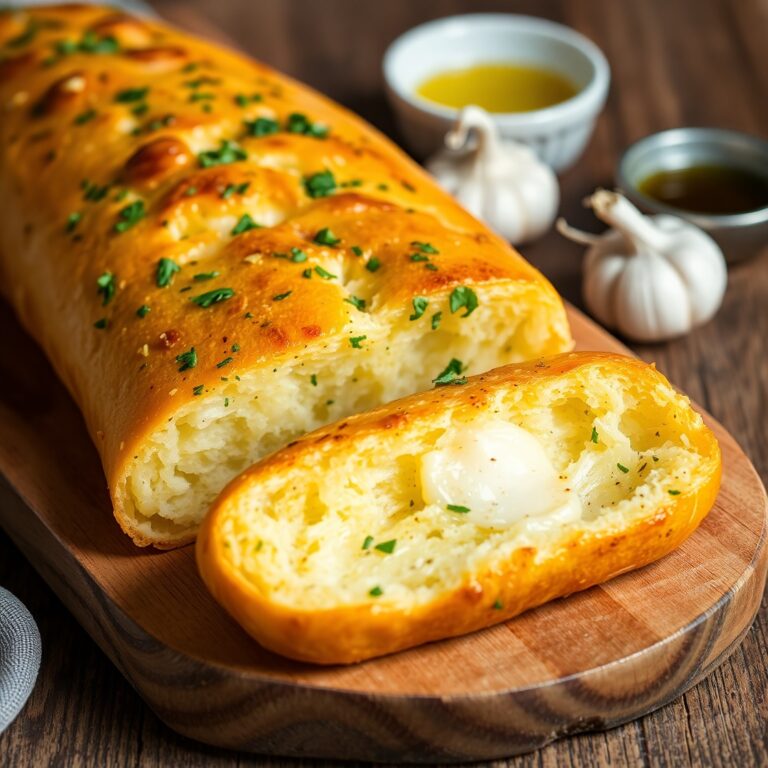
There’s something magical about watching pita bread puff up in the oven, turning from a flat round of dough into a golden, airy pocket. This recipe was born out of a craving for something warm, soft, and deeply satisfying—a simple bread that could cradle falafel, soak up spiced stews, or serve as a companion to creamy hummus.
I made this pita bread recipe on a quiet Sunday afternoon, with nothing more than pantry staples and a bit of curiosity. I wanted a homemade version that was far better than anything store-bought—something fresher, softer, and just a little more rustic. If you’ve ever wanted to try baking bread but felt overwhelmed, this is your perfect gateway. And if you’ve tried pita before and it didn’t puff, don’t worry—I’ll guide you through each step to get that perfect pocket.
Read on to discover how easy and satisfying it is to make your own pita bread at home.
Why I Love This Recipe

The first time I made homemade pita, I was floored by the difference. The texture was pillowy with a slight chew, and the flavor had depth—miles away from the plastic-wrapped versions.
What makes this recipe special is its simplicity. It only takes a few ingredients, most of which you probably already have in your kitchen. Yet, the result is something you can use in endless ways: a warm sandwich pocket, a wrap, a dipping bread, or even a quick pizza base. The versatility is incredible.
Another reason I return to this recipe again and again is the satisfaction of making real bread from scratch. The dough is forgiving, the process is meditative, and the final product is wildly rewarding. Watching the pitas puff up in the oven feels like a small miracle—and you made it happen.
Plus, unlike some breads that take hours or days to proof, this one is relatively quick. Whether you’re an experienced baker or just getting started, this pita bread will make you feel confident and capable.
Ingredients for Pita Bread
Good bread starts with good basics—and that’s exactly what this recipe is about. You won’t need anything fancy, just a few kitchen staples that work together to create that light, puffed-up bread.
Here’s what you’ll need:
All-purpose flour: This forms the structure of your pita. You can also use bread flour for a chewier texture.
Warm water: Not hot, just comfortably warm (around 105°F to 110°F). This helps activate the yeast and starts the fermentation process.
Active dry yeast: This is what gives the pita its lift. You can also use instant yeast; I’ll include tips on that below.
Olive oil: Adds a subtle richness and helps keep the bread tender.
Salt: Essential for flavor. Don’t skip it—it balances everything out.
Sugar: Just a touch to feed the yeast and help it activate.
This ingredient list is refreshingly short, and each one plays a key role. The result? A dough that’s soft, supple, and ready to transform into airy pita pockets.
How Much Time Will You Need
Pita bread is wonderfully doable even on a weeknight.
- Prep time: 20 minutes
- Rising time: 1.5 to 2 hours
- Shaping + resting: 15 minutes
- Cooking time: 2–3 minutes per pita
So in total, you’re looking at about 2.5 hours, most of which is hands-off. You’ll be amazed at how little active time it takes to get fresh, bakery-style pita at home.
How to Make This Pita Bread
Let’s break it down step-by-step. The process is simple once you understand the flow, and I’ll walk you through each part in a way that’s beginner-friendly and foolproof.
Step – 1: Activate the Yeast
In a large mixing bowl, combine 1 cup of warm water, the sugar, and the active dry yeast. Stir gently and let it sit for 5 to 10 minutes until foamy. This step is crucial—if the mixture doesn’t bubble, your yeast may be old or the water was too hot/cold.
Step – 2: Mix the Dough
Once your yeast is active, add the flour, salt, and olive oil to the bowl. Start mixing with a wooden spoon or your hand until the dough comes together.
If it’s too dry, add another tablespoon or two of water. The dough should be soft but not sticky.
Step – 3: Knead the Dough
Transfer the dough onto a lightly floured surface and knead it for about 8–10 minutes. You’re looking for a smooth, elastic dough. If using a stand mixer with a dough hook, knead for about 5–6 minutes.
The dough should be slightly tacky but not stick to your hands.
Step – 4: First Rise
Place the kneaded dough in a lightly oiled bowl. Cover with a damp cloth or plastic wrap. Let it rise in a warm, draft-free spot for 1.5 to 2 hours, or until it doubles in size.
A warm oven (turned off) with the light on works great.
Step – 5: Divide and Rest
Once the dough has risen, gently deflate it and divide it into 8 equal pieces. Roll each piece into a ball, then cover and let them rest for 15–20 minutes. This relaxes the gluten and makes them easier to roll out.
Step – 6: Roll Out the Dough
Take one ball at a time and roll it into a circle about 1/8 inch thick. The thinner you roll it, the more likely it is to puff. Keep the others covered to prevent drying out.
Place rolled-out dough on parchment paper or a floured surface.
Step – 7: Cook the Pitas
You have two options:
Oven method (recommended):
Preheat your oven to 500°F (260°C) with a baking steel or inverted baking sheet inside to heat. Once hot, place 1–2 pitas directly on the hot surface. Bake for 2–3 minutes, or until puffed and lightly golden.
Stovetop method:
Heat a cast iron or heavy skillet over medium-high. Place a rolled pita into the dry pan and cook for 1–2 minutes per side, until puffed and golden brown.
Step – 8: Cool and Store
Remove the puffed pitas and wrap them in a clean kitchen towel to keep them soft. Let them cool slightly before serving or storing.
Substitutions
Homemade pita is flexible, and here are some smart swaps you can make:
- Flour: Use whole wheat flour for up to 50% of the all-purpose flour for a nuttier flavor and added fiber. You can go 100% whole wheat, but expect a denser result.
- Yeast: If you have instant yeast, you can skip the proofing step and add it directly to the dry ingredients.
- Olive oil: Swap with avocado oil or even melted butter for a different flavor profile.
- Sugar: You can omit it entirely, but the yeast may take slightly longer to activate.
These tweaks allow you to personalize your pita without compromising quality. They’re especially useful if you’re working with dietary restrictions or pantry limitations.
Best Side Dish of Pita Bread
Pita bread is the perfect vehicle for dipping, scooping, and wrapping. Here are three classic pairings that elevate any meal:
Hummus
Creamy, garlicky, and packed with flavor—this Middle Eastern chickpea dip and warm pita are a match made in heaven.
Falafel
Stuff your pita pocket with crispy falafel, fresh veggies, and a drizzle of tahini sauce. It’s satisfying and completely plant-based.
Shakshuka
Dip your warm pita into a skillet of poached eggs in spicy tomato sauce for a comforting, protein-rich breakfast or brunch.
Serving and Presentation Tips
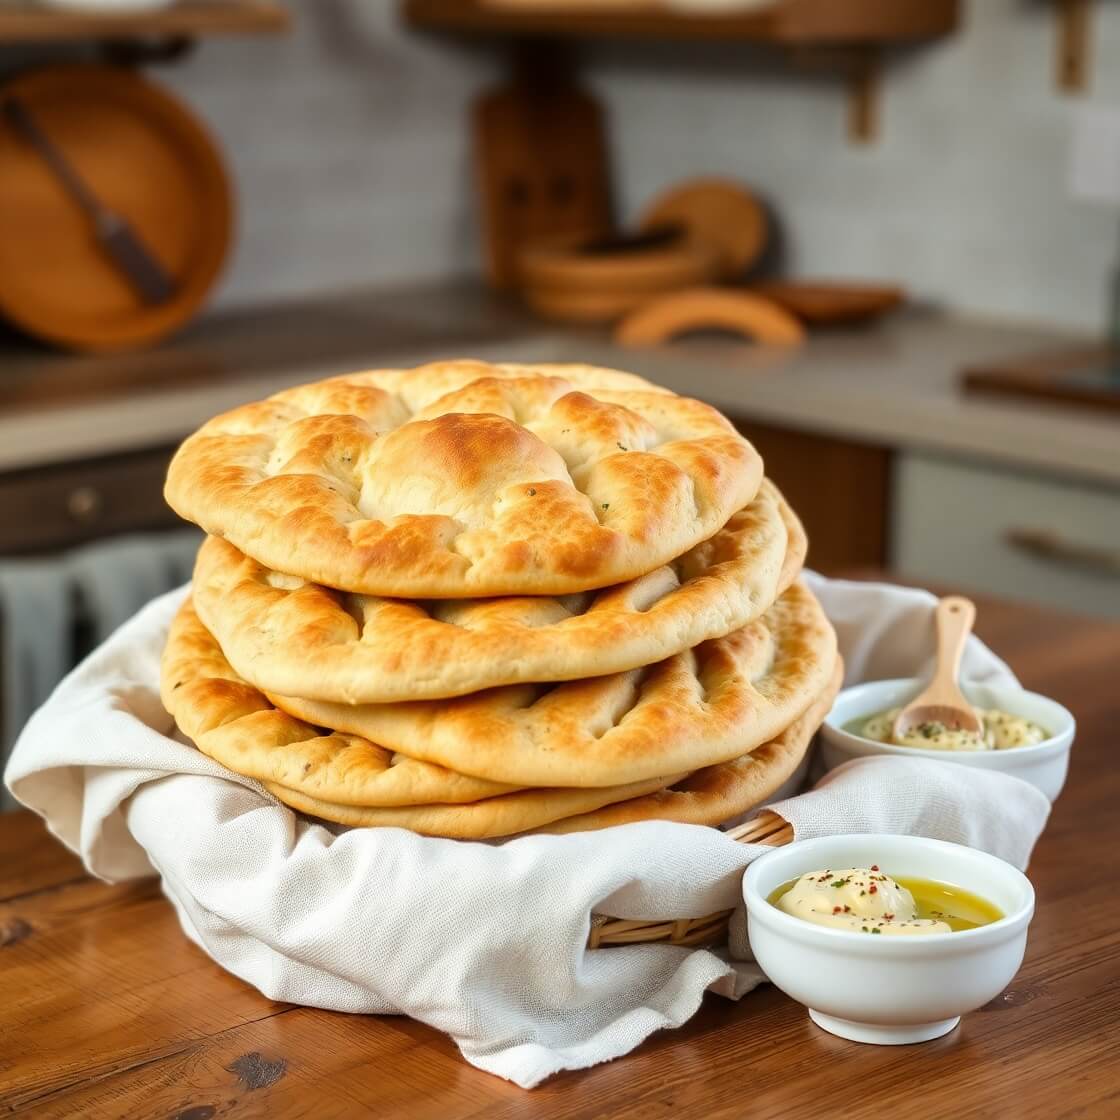
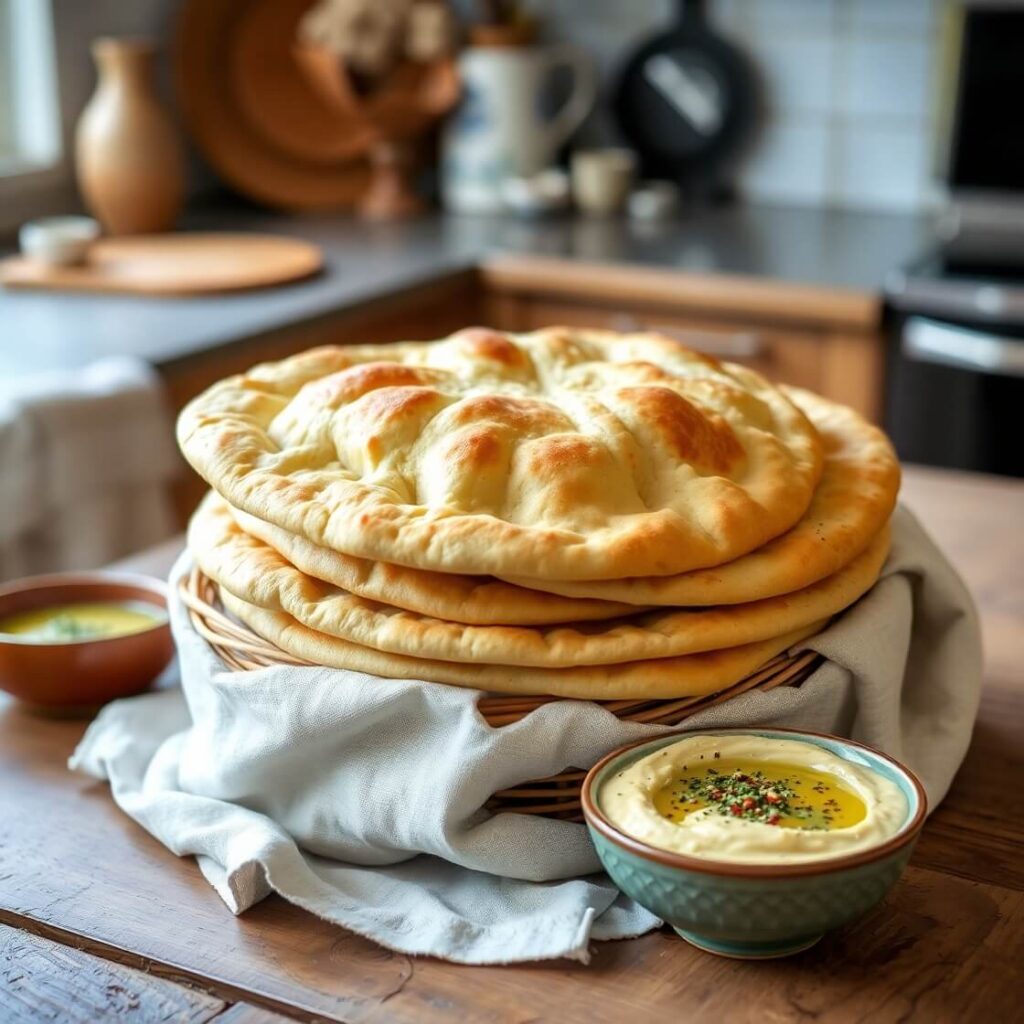
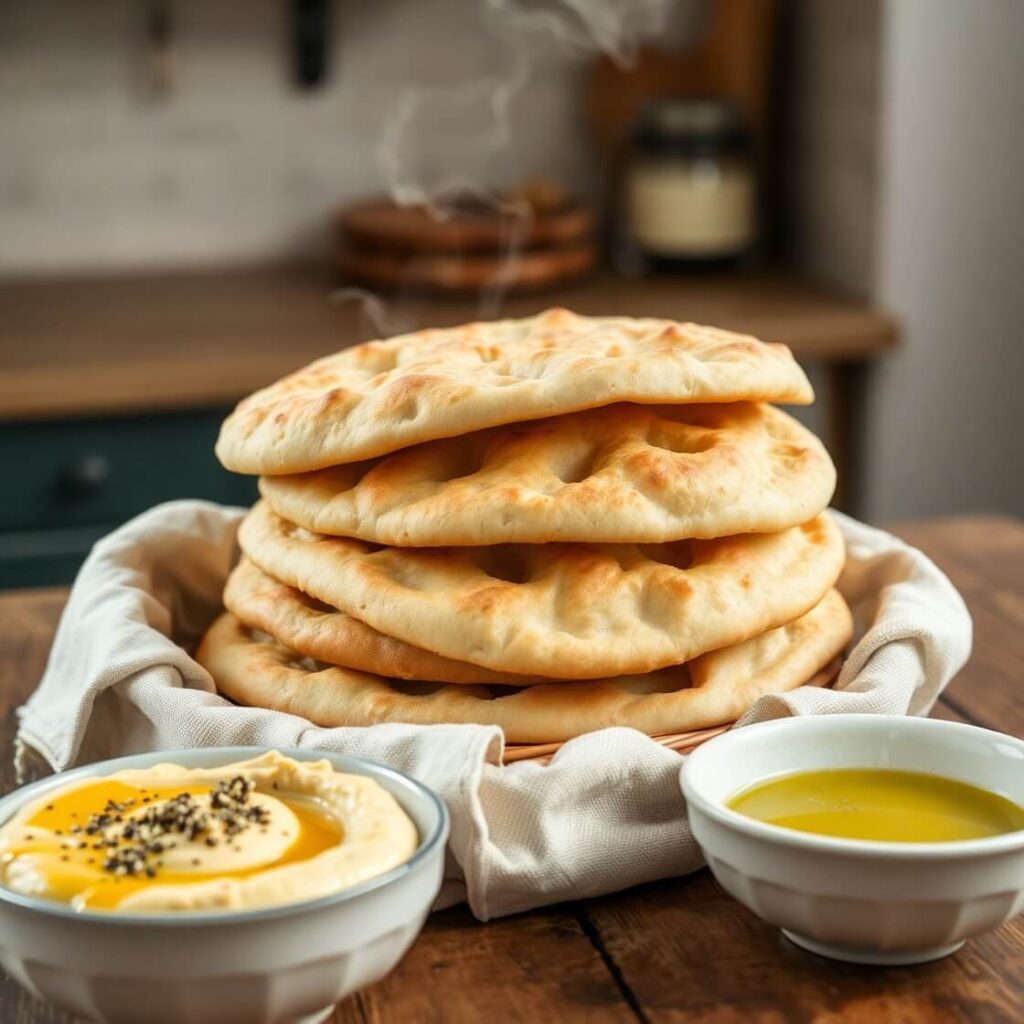
Warm, homemade pita bread deserves to be served in a way that celebrates its golden puff and pillowy softness.
One of the best ways to present pita is to serve it stacked in a linen-lined basket. This helps trap heat and moisture, keeping the bread soft and warm throughout the meal. Wrap the stack in a clean kitchen towel or cloth napkin so your guests can pull one out like a treasured treat.
If you’re serving dips like hummus or baba ganoush, slice the pitas into triangles or strips. For sandwiches or wraps, slice each pita in half and gently open the pocket—fill it with falafel, roasted vegetables, or grilled meats with fresh herbs and sauces.
For a dinner table, a wooden board with pita wedges and a trio of dips makes a beautiful and rustic centerpiece. A drizzle of olive oil and a light sprinkle of za’atar or sesame seeds on top can elevate the visual appeal.
Tips and Tricks to Make This Recipe Better
The secret to great pita bread isn’t just in the ingredients—it’s in the process. These simple yet effective tips can help you make pita that puffs perfectly and tastes divine.
1. Get the oven or skillet hot—really hot
Whether you’re baking or using a stovetop, temperature matters. A hot surface causes rapid steam formation inside the dough, creating that signature puff.
2. Don’t over-flour your surface
Too much flour can make the dough dry and prevent puffing. Light dusting is enough for rolling.
3. Roll evenly and thinly
Uneven dough leads to uneven puffing. Use gentle, even pressure when rolling out the rounds. Aim for about 1/8 inch thickness.
4. Cover the dough while working
As you roll out one piece, keep the rest covered with a damp cloth to prevent them from drying out.
5. Let the dough rest before rolling
The 15-minute rest after dividing the dough helps relax gluten, making rolling easier and more uniform.
These small efforts lead to major results—and make your homemade pita taste and look like it came from a professional kitchen.
Common Mistakes to Avoid
Even though this recipe is beginner-friendly, there are a few common pitfalls to be aware of.
1. Cold oven or pan
If your oven or pan isn’t hot enough, the dough won’t puff. Make sure your surface is thoroughly preheated.
2. Dough too thick or too thin
Thick dough won’t puff well; too thin can tear easily. Stick to about 1/8 inch.
3. Not letting the dough rise properly
If the dough hasn’t doubled, it may not puff properly when baked. Be patient during the rising stage.
4. Using old yeast
Expired or inactive yeast won’t activate properly. Always test your yeast by proofing it in warm water with sugar.
5. Skipping the resting stage after shaping
This rest period helps the gluten relax. Rolling out dough without it can lead to shrinkage and uneven cooking.
Avoid these missteps, and you’re far more likely to produce soft, airy pitas every time.
How to Store It
Pita bread is best fresh, but it stores well too—here’s how to keep it soft and ready to use.
Short-term storage:
Let the pita cool completely. Store in a zip-top bag or airtight container at room temperature for up to 3 days.
Freezing:
Stack cooled pitas with parchment paper between each one, then place them in a freezer-safe bag. Freeze for up to 3 months. To reheat, warm in a toaster oven, skillet, or directly on a flame.
Reheating:
Wrap in foil and warm in a 300°F oven for 5–7 minutes, or place directly on a skillet for 1–2 minutes per side.
Avoid storing warm pita in plastic, as this traps steam and makes them soggy.
FAQ
What if my pita doesn’t puff?
No worries—you still have soft, delicious flatbread. Puffing depends on oven heat, dough thickness, and moisture. Try again with a hotter oven and evenly rolled dough.
Can I make pita without yeast?
You can use baking powder for a quick flatbread, but it won’t puff the same way. For authentic pockets, yeast is essential.
Can I use whole wheat flour?
Yes, you can swap up to 50% of the all-purpose flour with whole wheat. More than that and the pitas may become too dense.
Can I make this dough ahead of time?
Absolutely. After kneading, cover the dough tightly and refrigerate for up to 24 hours. Bring to room temp before dividing and shaping.
Why did my pita burn on the skillet?
Your heat might be too high. Use medium to medium-high heat and watch carefully—these cook quickly.
Pita Bread Recipe
Warm, soft, and beautifully puffed—this homemade pita bread is easier than you think. Made with pantry staples and a simple process, these pitas are perfect for stuffing, dipping, or just enjoying warm out of the oven. Whether you bake them or use a hot skillet, you’ll love how fresh and pillowy these come out. This recipe is beginner-friendly and delivers authentic results with just a little patience. Serve them with hummus, wrap them around falafel, or enjoy them with shakshuka—this is one of those recipes you’ll turn to again and again.
- Prep Time: 20 minutes
- Cook Time: 15 minutes
- Total Time: 2 hours 30 minutes
- Yield: 8 1x
- Category: Bread
- Method: Baking or stovetop
- Cuisine: Middle Eastern
- Diet: Vegetarian
Ingredients
- 2 ¼ tsp active dry yeast
- 1 tsp sugar
- 1 cup warm water (105–110°F)
- 2 ½–3 cups all-purpose flour
- 1 tsp salt
- 1 tbsp olive oil
Instructions
- In a large bowl, mix warm water, sugar, and yeast. Let sit 5–10 minutes until foamy.
- Stir in olive oil, then add flour and salt. Mix until dough comes together.
- Knead on a floured surface for 8–10 minutes until smooth.
- Place in oiled bowl, cover, and let rise for 1.5–2 hours until doubled.
- Divide dough into 8 balls. Rest 15 minutes covered.
- Roll each into a circle about 1/8 inch thick.
- Bake on preheated baking stone or inverted baking sheet at 500°F for 2–3 minutes, until puffed.
- Wrap warm pitas in a clean towel to keep soft.
Notes
- Instant yeast can be substituted—add it directly to the flour.
- Use a cast iron skillet for stovetop cooking if no oven.
- Add a sprinkle of za’atar before baking for extra flavor.
- Store cooled pitas in an airtight bag for up to 3 days or freeze for longer.
Nutrition
- Serving Size: 8
- Calories: 170
- Sugar: 0.5g
- Sodium: 190mg
- Fat: 3g
- Saturated Fat: 0.5g
- Unsaturated Fat: 2.5g
- Trans Fat: 0g
- Carbohydrates: 30g
- Fiber: 1g
- Protein: 4g
- Cholesterol: 0mg