Gluten free bread isn’t just a trend—it’s a necessity for many who cannot tolerate gluten, yet still crave the comfort and warmth of freshly baked bread. This recipe came to life out of a personal journey, inspired by the desire to enjoy homemade bread without the digestive discomfort gluten can cause. If you’ve ever struggled to find a gluten free bread that tastes as good as the real thing, you’re in the right place. This bread is soft, flavorful, and has that satisfying texture you want from a classic loaf. Keep reading, because I promise this recipe will change how you think about gluten free baking.
Why I Love This Recipe?

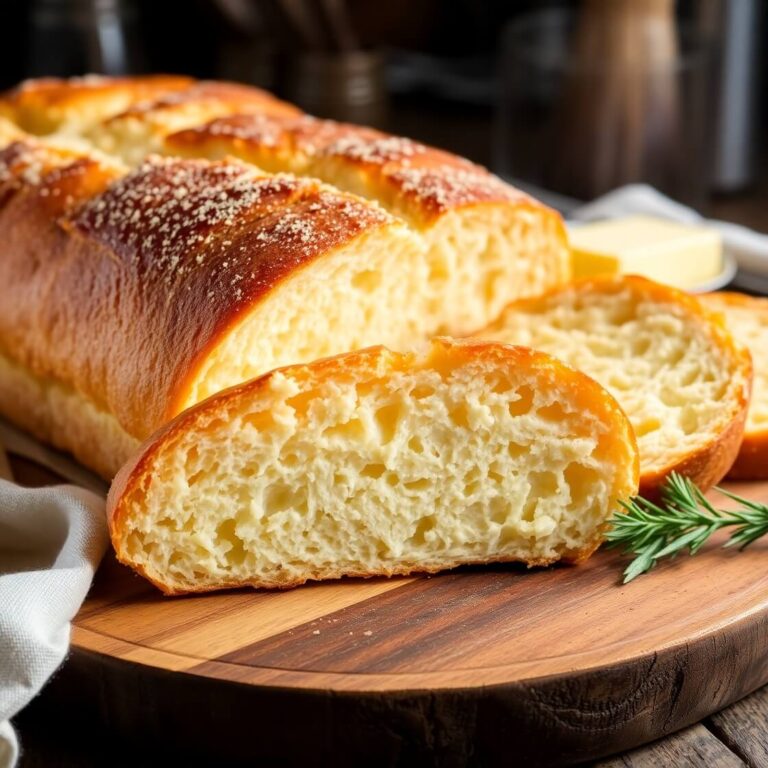
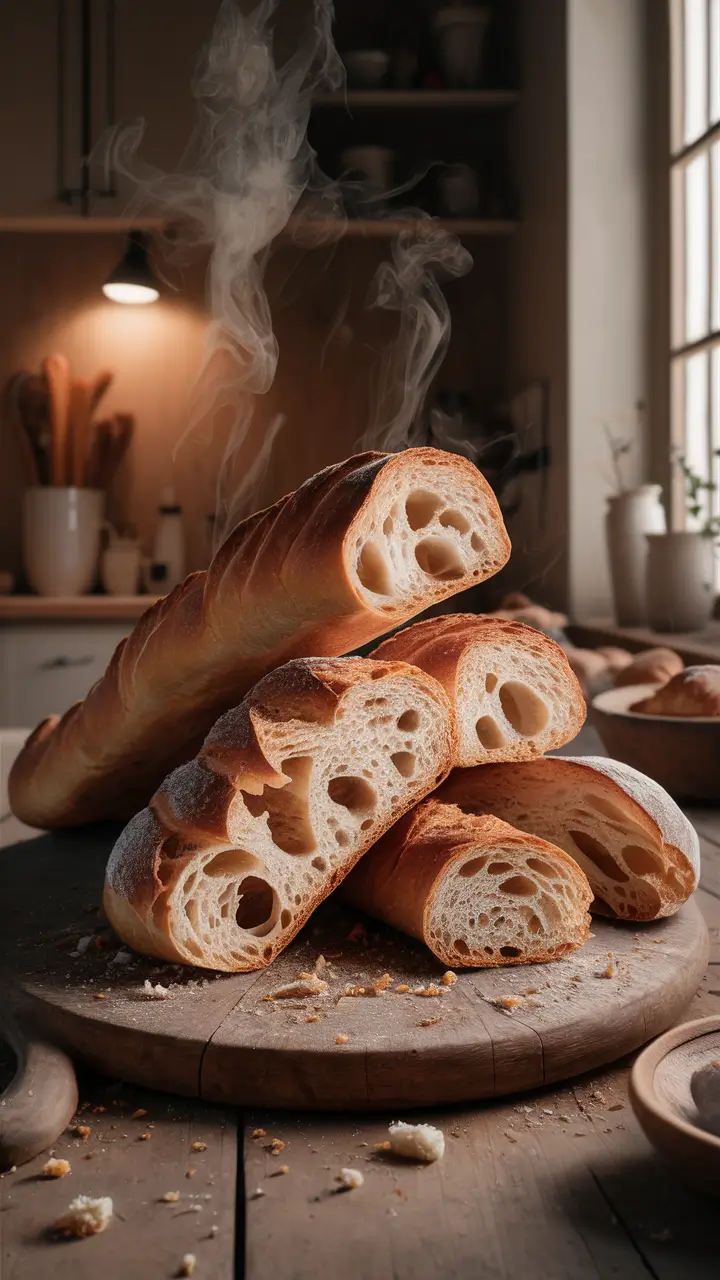
This gluten free bread is close to my heart because it proves that going gluten free doesn’t mean sacrificing flavor or texture. Many gluten free breads you find are either too dense, crumbly, or dry. But this recipe strikes the perfect balance — it’s light, airy, and moist, making it perfect for sandwiches, toast, or simply enjoying with a pat of butter.
What sets this bread apart is the blend of flours and the careful balance of moisture and binding agents, which mimic the elasticity of gluten without compromising on taste. Plus, the recipe is designed to be beginner-friendly, with clear steps that help you avoid common pitfalls. Whether you’re baking for health reasons or just want to try something new, this recipe offers a comforting, satisfying bread that anyone can make at home.
Ingredients for Gluten Free Bread
Before we dive into baking, let’s talk about the ingredients that make this bread so special.
You’ll need a combination of gluten free flours—typically rice flour, tapioca starch, and maybe a little almond or oat flour—to create the right structure and chewiness. These flours are essential because no single gluten free flour alone will give you the best texture.
To make the bread rise beautifully, you’ll use yeast, along with a bit of sugar or honey to feed it. Eggs act as both a binder and a leavening aid, helping hold the bread together and giving it a tender crumb. Xanthan gum or psyllium husk powder is also necessary to replace the elasticity gluten normally provides. These ingredients might sound unfamiliar if you haven’t baked gluten free before, but they’re easy to find in most supermarkets or online.
Dairy or dairy-free milk adds moisture, and a little oil keeps the bread soft. Salt brings out all the flavors. It’s important to have fresh yeast and measure your ingredients precisely to get the best results. The beauty of this recipe is that it balances all these ingredients so that your bread won’t feel like a compromise.
How Much Time Will You Need?
Baking gluten free bread is a rewarding process that takes some patience but not too much time. You can expect to spend about 15 minutes preparing the dough. Then, the dough will need to rise for about 1 to 1.5 hours, depending on your room temperature and yeast activity.
After the dough has risen, the baking itself will take around 35 to 40 minutes. Overall, from start to finish, you’re looking at roughly 2 to 2.5 hours, mostly waiting for the dough to rise. It’s well worth the time for homemade bread that tastes fresh and nourishing.
How to Make This Gluten Free Bread

Here’s a detailed step-by-step guide to baking this bread perfectly:
Step – 1: Prepare your yeast mixture by combining warm milk (about 110°F or 43°C) with sugar and yeast. Stir gently and let it sit for 5-10 minutes until it becomes frothy, signaling that the yeast is active.
Step – 2: In a large mixing bowl, combine the gluten free flours, xanthan gum (or psyllium husk), and salt. Whisk them together to evenly distribute.
Step – 3: In a separate bowl, whisk the eggs lightly with oil and the activated yeast mixture.
Step – 4: Gradually pour the wet ingredients into the dry flour mixture. Mix well using a hand mixer or stand mixer with a dough hook attachment for about 3-5 minutes until the batter is smooth but thick.
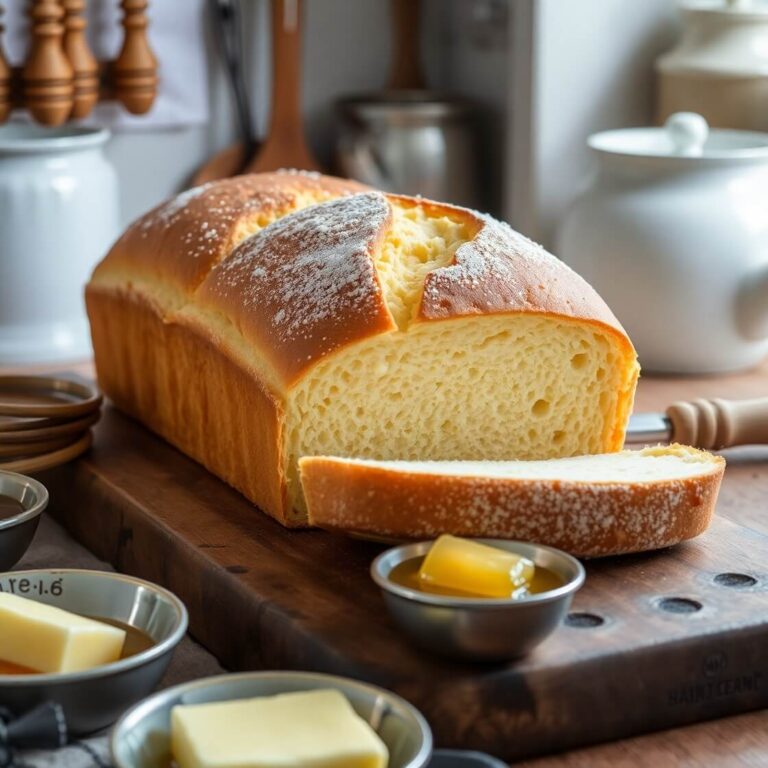
Step – 5: Transfer the dough to a greased loaf pan, smoothing the top with a spatula. Gluten free dough is more batter-like than traditional dough, so don’t worry if it looks different.
Step – 6: Cover the pan loosely with a damp towel or plastic wrap and place it in a warm spot to rise for 1 to 1.5 hours, until the dough has roughly doubled in size.
Step – 7: Preheat your oven to 375°F (190°C). Once risen, place the loaf in the oven and bake for 35-40 minutes until the crust turns golden brown and a toothpick inserted in the center comes out clean.
Step – 8: Remove the bread from the oven and let it cool in the pan for 10 minutes before transferring it to a wire rack to cool completely. This cooling step helps the bread set and slice cleanly.
Substitutions
You might wonder if you can swap some ingredients to suit your pantry or dietary preferences. Luckily, this recipe is quite flexible.
Instead of dairy milk, you can use almond milk, oat milk, or coconut milk to keep it dairy-free. If you don’t have xanthan gum, psyllium husk powder is an excellent alternative that also adds fiber. For those avoiding eggs, flax eggs (1 tablespoon ground flaxseed mixed with 3 tablespoons water per egg) can work as a binding agent, though the texture will be slightly different.
You can also experiment with gluten free flour blends—some people like to add a little buckwheat or sorghum flour for a nuttier flavor. Just make sure your blend has a good starch balance for the best rise. Honey can be swapped for maple syrup or agave if you prefer a vegan sweetener.
Best Side Dishes for Gluten Free Bread
Eating this bread on its own is a delight, but pairing it with the right sides elevates the experience.
- Creamy avocado spread with a sprinkle of chili flakes brings richness and a bit of heat.
- Classic tomato soup, perfect for dipping, makes for a comforting combo.
- A fresh, crisp garden salad with lemon vinaigrette balances the bread’s softness.
These side dishes make every bite satisfying and keep your meal balanced.
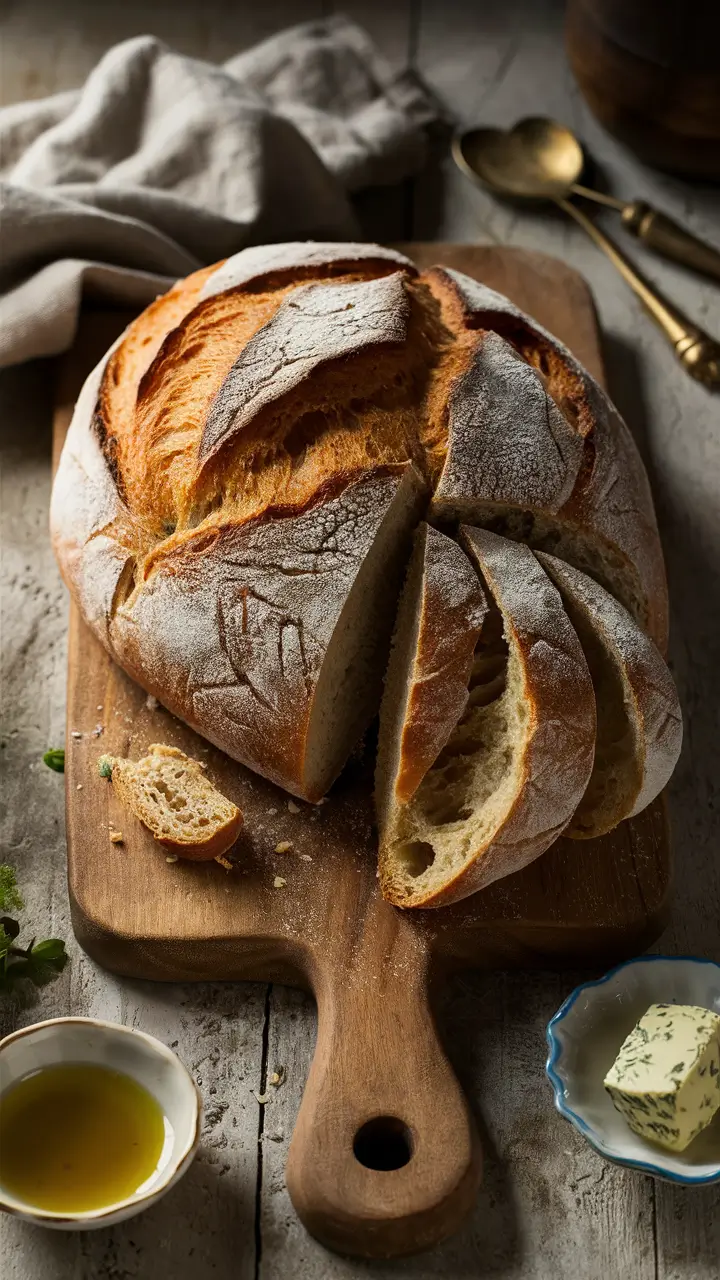
Serving and Presentation Tips
When it comes to serving your gluten free bread, presentation can make all the difference. Imagine slicing the loaf into even, thick slices that show off the soft, moist crumb inside, with a golden crust that invites you in. Using a serrated bread knife will help you cut clean slices without squashing the bread.
For a beautiful touch, toast the slices lightly before serving. This enhances the bread’s flavor and adds a slight crunch that contrasts wonderfully with soft spreads or toppings. You can arrange slices in a rustic basket lined with a clean linen napkin for a cozy, homemade feel.
If you want to impress guests, try serving small open-faced sandwiches with vibrant toppings like fresh herbs, sliced avocado, or smoked salmon. Garnishing the plate with a few sprigs of rosemary or thyme adds an aromatic hint and visual appeal. Simple but thoughtful presentation turns an everyday loaf into a centerpiece of your meal.
Tips and Tricks to Make This Recipe Better
Perfecting gluten free bread takes a bit of practice, but these tips can boost your success and flavor every time.
Always use fresh yeast. Old or expired yeast won’t rise properly, resulting in dense bread. Proof the yeast first in warm milk with sugar to check it’s active.
Don’t skip the xanthan gum or psyllium husk powder—they are essential to give the dough elasticity and hold moisture. Without them, your bread might crumble or be too dry.
Mix the dough well but avoid overmixing. Overworking gluten free dough can make the crumb tough. Aim for a smooth batter-like consistency that’s thick but pourable.
Let the dough rise in a warm, draft-free spot. If your kitchen is cold, preheat the oven to 100°F (38°C), turn it off, and place the covered dough inside to rise.
Use a loaf pan with high sides to help the bread rise upwards instead of spreading flat.
Allow the bread to cool completely before slicing. Warm gluten free bread is fragile and prone to tearing, but cooling helps it firm up and slice neatly.
Common Mistakes to Avoid
Gluten free bread baking can be tricky, but avoiding these common mistakes will save you frustration.
Skipping the rising time or rushing it leads to dense, heavy bread. Be patient and give the dough enough time to double in size.
Using cold liquids when activating yeast can kill the yeast, preventing proper rise. Use warm (not hot) milk to wake up your yeast.
Not measuring ingredients accurately is a major culprit in failed gluten free bread. Flours absorb moisture differently, so weigh your ingredients for best results.
Neglecting the binding agents like xanthan gum or psyllium husk powder can cause the bread to fall apart or be crumbly.
Cutting the bread too soon, while it’s still hot, causes it to crumble. Let it cool fully before slicing.
How to Store It
Gluten free bread is best eaten fresh but can be stored properly to enjoy later.
Allow the loaf to cool completely before wrapping it tightly in plastic wrap or placing it in an airtight container. Store it at room temperature for up to 2 days.
For longer storage, slice the bread and freeze it in a freezer-safe bag with parchment paper between slices to prevent sticking. Frozen bread stays good for up to 3 months.
To thaw, simply toast slices directly from the freezer or leave them on the counter for 30 minutes.
Avoid refrigeration, as it can dry out gluten free bread quickly.
FAQ
Can I make this gluten free bread dairy-free?
Yes! Simply swap the milk with any plant-based milk such as almond, oat, or coconut milk, and use oil instead of butter if the recipe calls for it.
Is this bread suitable for people with celiac disease?
Absolutely, provided you use certified gluten free flours and ensure no cross-contamination in your kitchen.
Can I make this bread without eggs?
You can replace each egg with a flax egg (1 tablespoon ground flaxseed + 3 tablespoons water). Keep in mind the texture might be slightly denser.
What is the best way to get a softer crust?
Brush the top of the dough with melted butter before baking and cover the loaf with foil halfway through baking to prevent over-browning.
Can I use a bread machine for this recipe?
Yes, but make sure your machine has a gluten free setting, and avoid overmixing to prevent tough bread.
Gluten Free Bread
This gluten free bread recipe brings the comfort of homemade bread to those who avoid gluten. It’s crafted with a blend of gluten free flours, binding agents like xanthan gum, and classic yeast fermentation to create a loaf that’s soft, airy, and delicious. Perfect for sandwiches, toast, or dipping in soups, this bread is a staple you’ll want to keep on hand. The recipe is beginner-friendly and adaptable for dairy-free or egg-free variations. Enjoy fresh bread that doesn’t compromise on taste or texture!
- Prep Time: 15 minutes
- Cook Time: 40 minutes
- Total Time: 2 hours 15 minutes
- Yield: 1 loaf (about 12 slices) 1x
- Category: Baking, Bread
- Method: Oven Baking
- Cuisine: American
- Diet: Gluten Free
Ingredients
-
2 cups gluten free flour blend (rice flour, tapioca starch, almond flour)
-
1 tsp xanthan gum (or psyllium husk powder)
-
1 tsp salt
-
1 tbsp sugar or honey
-
1 packet (2 1/4 tsp) active dry yeast
-
1 1/4 cup warm milk (or dairy-free alternative)
-
2 large eggs
-
2 tbsp oil (vegetable or olive oil)
Instructions
-
Proof yeast in warm milk with sugar until frothy (5-10 minutes).
-
Whisk dry ingredients (flours, xanthan gum, salt) in a bowl.
-
In another bowl, whisk eggs and oil, then add yeast mixture.
-
Combine wet and dry ingredients; mix until smooth batter forms.
-
Pour into greased loaf pan and cover; let rise in a warm place until doubled (1-1.5 hours).
-
Bake at 375°F (190°C) for 35-40 minutes until golden.
-
Cool in pan 10 minutes, then on rack completely before slicing.
Notes
-
Measure ingredients carefully for best results.
-
Don’t skip binding agents like xanthan gum.
-
Let bread cool fully before slicing to avoid crumbling.
-
Try variations with different gluten free flours for unique flavors.
Nutrition
- Serving Size: 1 loaf
- Calories: 120